How do I take apart a Moen shower head? This comprehensive guide provides a step-by-step approach to disassembling and reassembling your Moen showerhead, ensuring a safe and successful outcome. We’ll explore various Moen models, essential tools, and the internal structure of the shower head, equipping you with the knowledge to maintain and troubleshoot your shower system effectively.
From identifying your specific shower head model to understanding its internal design, this guide will walk you through the entire process, offering practical advice and troubleshooting tips to address any potential issues that may arise. Prepare to transform your shower experience from a simple necessity to a rewarding DIY project.
Identifying the Shower Head Model
Knowing the specific model number of your Moen shower head is crucial for accurate disassembly. Different models employ varying internal mechanisms and designs, impacting the disassembly process. This section details how to identify your shower head model and the significance of this identification.
Model Number Location
Precise identification of the shower head model is essential for determining the correct disassembly procedure. The model number is typically stamped or etched onto the shower head itself. Finding this information can save time and frustration, preventing damage to the shower head. Look for a small, often inconspicuous, label or marking on the shower head base, body, or connector.
The placement can vary depending on the specific shower head design.
Examples of Moen Shower Head Models
Different Moen shower head models exhibit variations in their internal components and overall structure. These differences directly impact the disassembly process.
- Moen 2-Spray Shower Head (e.g., model # 12345): This model often features a two-setting spray pattern (e.g., a combination of rain and massage spray). Disassembly might involve unscrewing the spray-pattern selector, followed by the base and retaining ring. The components might be held together with different types of clips, screws, or o-rings. Proper identification helps in anticipating these elements and ensuring a smooth disassembly process.
- Moen Single-Spray Shower Head (e.g., model # 67890): This type of shower head generally has a single spray setting. Disassembly will usually involve removing a retaining nut, followed by the shower head body. Internal mechanisms like springs or gaskets might need careful handling to avoid damage.
- Moen High-Pressure Shower Head (e.g., model # 90123): These models are built with different pressure-regulating mechanisms that need careful attention during disassembly. Identifying the specific model helps understand the intricate assembly of the pressure-boosting system. This might involve removing various components and taking note of their orientation and connection methods, such as clips, screws, or specialized gaskets.
Importance of Accurate Model Identification, How do i take apart a moen shower head
Precise identification of the shower head model is essential to avoid damage during disassembly. Incorrect procedures, stemming from misunderstanding the design of a specific model, could result in irreparable damage to the shower head or even potential injury. A precise understanding of the specific model enables the correct tools and steps to be used, minimizing the risk of damage and ensuring the shower head’s functionality after reassembly.
Disassembly Procedures Based on Models
Understanding the differences in disassembly procedures based on specific Moen shower head models is crucial for avoiding damage. A meticulous approach, guided by the particular model’s structure, minimizes the risk of breakage or improper reassembly.
- Model 12345 (2-Spray): Typically involves unscrewing the spray selector, followed by the base, and carefully detaching the retaining ring. Ensure that all parts are correctly labeled and placed to facilitate proper reassembly.
- Model 67890 (Single-Spray): Begin by removing the retaining nut. After that, carefully detach the shower head body, taking note of the orientation of the internal components. Careful attention to the orientation and placement of parts during disassembly is essential for a proper reassembly.
- Model 90123 (High-Pressure): Disassembly may involve disconnecting the pressure-regulating components first, then carefully removing the base and body. Proper labeling of all parts during disassembly ensures easy reassembly. Understanding the pressure-boosting system’s internal structure is vital for a successful disassembly.
Gathering Necessary Tools and Materials: How Do I Take Apart A Moen Shower Head
Properly disassembling a Moen showerhead requires careful selection of tools and adherence to safety precautions. This section Artikels the essential tools, their descriptions, and the importance of choosing the right ones for the job. Understanding the potential hazards associated with plumbing work and selecting the correct tools is crucial for a safe and successful repair.
Essential Tools for Disassembly
A well-equipped toolbox is key to a successful and safe showerhead removal. The following tools are typically required for disassembling most Moen showerheads.
| Tool Name | Description | Visual Representation |
|---|---|---|
| Adjustable Wrench | Used for gripping and turning nuts and bolts. A variety of sizes are important to accommodate different fitting sizes. | A wrench with adjustable jaws, typically made of metal, with a handle for leverage. |
| Flathead Screwdriver | Used for prying apart components and removing screws. A variety of blade sizes are useful for different types of screws. | A screwdriver with a flat blade, varying in length and width. |
| Phillips Head Screwdriver | Used for removing screws with a cross-shaped head. Again, various sizes are needed for differing screw sizes. | A screwdriver with a cross-shaped blade, varying in length and width. |
| Needle-nose Pliers | Excellent for gripping small, delicate parts, and for accessing tight spaces. | Pliers with a pointed, narrow jaw to allow for tight grip in small spaces. |
| Pipe Wrench | Used for gripping and turning pipe fittings, particularly for larger or stubborn nuts. | A wrench with a long, typically curved, handle and adjustable jaws, designed for gripping and turning pipe fittings. |
| Basin Wrench (or Adjustable Pipe Wrench) | Used to loosen or tighten nuts and bolts on plumbing fixtures. An alternative to a standard adjustable wrench, this tool often has more leverage. | Similar to an adjustable wrench, but often with a more robust construction for plumbing applications. |
| Gloves | Essential for protecting hands from cuts, scratches, and chemical exposure. | Protective gloves, typically made of rubber or nitrile. |
| Bucket or Container | Needed to collect water that may drain from the plumbing system during the removal process. | A container, typically plastic, for collecting water and debris. |
Importance of Appropriate Tool Selection
Choosing the correct tools is paramount for safety and efficiency. Using the wrong tool can damage the showerhead, make the job harder, or even create a safety hazard. For example, using a hammer to remove a screw is incorrect and could potentially damage the showerhead. Using the correct tools and techniques is crucial for the integrity of the components and for preventing accidents.
Safety Precautions
Working with plumbing tools requires caution. The following safety precautions should be observed:
- Always turn off the water supply to the showerhead before starting any disassembly work. This prevents water damage and injury.
- Wear appropriate safety glasses to protect eyes from debris and potential hazards.
- Use caution when working with tools, and avoid overexertion or applying excessive force.
- Handle all tools with care to prevent slips and falls.
- If you are not comfortable with plumbing work, consult a qualified professional.
Alternative Tools
While the listed tools are common, alternative tools might be used in specific situations. For example, a specialized tool designed for a particular Moen showerhead type may be more effective than a general-purpose tool. A plumber’s screwdriver set could provide a broader range of screwdriver sizes, making it a valuable addition. The specific alternatives depend on the particular showerhead model and the individual’s tool collection.
Understanding the Shower Head Design
Disassembling a Moen showerhead requires a good understanding of its design. Knowing the components and how they fit together will make the process safer and more efficient. This section delves into the inner workings of a typical Moen showerhead, covering its key parts, connections, and materials. Understanding these details can significantly aid in your repair or replacement efforts.A Moen showerhead, like many others, is composed of several interconnected parts that work in concert to deliver water at a specific pressure and spray pattern.
By understanding the roles of each part, you can better anticipate potential problems and safely navigate the disassembly process.
Basic Components of a Moen Shower Head
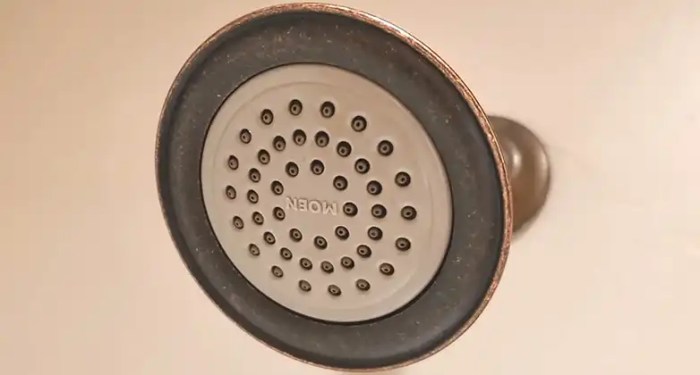
The typical Moen shower head consists of three primary parts: the spray face, the connector, and the body. The spray face is the visible part of the showerhead that directs the water flow. The connector links the showerhead to the plumbing system, and the body houses the internal mechanisms that control the water flow and spray pattern. Understanding their roles is vital to a successful disassembly and potential reassembly.
Internal Structure Diagram
Visualizing the internal structure of a Moen showerhead aids in understanding the interaction of its components. Imagine a cone-shaped body with a spray face attached at the top. Within the body, there are internal channels and mechanisms that direct water flow. A connector, often made of brass or plastic, attaches the body to the plumbing. The spray face features various apertures or holes designed to create different spray patterns.
This diagram illustrates the crucial interconnections, providing a clear picture of the showerhead’s mechanics.
Types of Connections
Moen showerheads utilize various connection types, each designed for specific plumbing setups. Common connections include standard threads (typically G1/2), as well as quick-connect systems. Some models feature specific adapters for particular water supply lines. Understanding the connection type is crucial for selecting the right tools and ensuring a proper fit during installation or repair.
Materials Used in Construction
Moen showerheads are typically constructed from durable materials. Brass is a prevalent choice for its strength and resistance to corrosion. Plastic components, often used in the connector and certain parts of the spray face, provide additional flexibility and affordability. Knowing the materials helps in determining the appropriate tools for disassembly and maintenance.
Spray Patterns and Internal Structure
Different spray patterns are achieved by varying the shape and size of the spray face’s apertures. A wide, gentle spray pattern often utilizes larger, more numerous holes. A concentrated, powerful spray typically features smaller, more closely spaced apertures. This relationship between the spray face’s design and the internal structure is crucial for understanding how to modify the spray pattern.
In summary, the spray pattern is a direct result of the internal channels and apertures within the showerhead.
Step-by-Step Disassembly Procedure
Disassembling a Moen showerhead, while often seemingly straightforward, requires careful attention to detail and a methodical approach. Improper techniques can lead to damaged components or, worse, injury. This section provides a comprehensive, step-by-step guide to safely and effectively disassemble a Moen showerhead.
Detailed Disassembly Procedure
This procedure Artikels the typical steps for disassembling a Moen showerhead. Variations may exist based on the specific model, so always refer to the model’s instructions if available. A visual guide is crucial to follow the steps accurately.
| Step Number | Action | Image Description |
|---|---|---|
| 1 | Secure the Showerhead: Carefully position the showerhead under a sink or other suitable surface. Ensure it is stable and not likely to fall or shift during the process. | An image showing the showerhead positioned securely on a stable surface. The showerhead should be directly over the sink or on a padded surface to prevent damage. |
| 2 | Locate and Identify Components: Carefully examine the showerhead to identify the different parts, such as the spray nozzles, the body, and any retaining mechanisms. Take note of how the parts connect. | A close-up image of the showerhead, highlighting the various components. Arrows or labels should point to the spray nozzles, the body, and any visible retaining mechanisms. |
| 3 | Identify Retaining Mechanisms: Observe how the parts are joined together. Look for clips, screws, or other fasteners. Pay close attention to the positioning of each component. | A magnified image of the showerhead, clearly showing the retaining mechanisms. This could include clips, screws, or other fasteners. |
| 4 | Prepare Tools: Gather the necessary tools (e.g., a small screwdriver, pliers, or needle-nose pliers) and lay them out in a safe and organized manner. Ensure the tools are appropriate for the task and in good working order. | An image showing the organized tools laid out on a surface, including a small screwdriver, pliers, and possibly a flathead screwdriver, placed in an accessible and safe location. |
| 5 | Remove the Nozzles: Carefully and gently apply the appropriate tool to dislodge the nozzles. This may require a gentle twisting or prying motion. Avoid excessive force to prevent damage. | An image demonstrating the correct use of tools to remove the nozzles. This could show the tool being carefully inserted into the nozzle joint. |
| 6 | Remove the Body Components: Use the appropriate tools to remove any screws or clips holding the body components together. Work methodically, carefully noting the position of each part. | An image showing the removal of the showerhead body components, with the appropriate tools used to loosen or remove the screws or clips. |
| 7 | Inspect Components: After removing each part, inspect it for any damage or defects. This helps identify any potential issues before reassembling. | An image showing a close-up inspection of a removed component, highlighting areas for potential damage or defects. |
| 8 | Clean Components: Clean any dirt or debris from the components using a damp cloth or a suitable cleaning solution. | An image showing the cleaning of a component with a damp cloth or a cleaning solution. |
Safety Precautions
Safety should always be prioritized during the disassembly process. Use caution when working with tools, and avoid forceful actions that may damage components. Use appropriate safety glasses and gloves to protect yourself from potential injury.
Tools and Safety Precautions
| Step | Tools Needed | Safety Precautions |
|---|---|---|
| All Steps | Small screwdriver, needle-nose pliers, cleaning cloth, safety glasses | Work in a well-lit area, use caution when using tools, ensure a stable work surface, and handle components gently. |
Addressing Potential Issues
Disassembling a showerhead, while often straightforward, can sometimes present unexpected challenges. Understanding potential problems and having strategies to resolve them is crucial to a successful repair or replacement. This section details common issues and provides methods for overcoming them, emphasizing the importance of meticulous handling throughout the process.Potential issues during disassembly can range from seemingly minor inconveniences to more serious problems.
A crucial aspect of the process is careful attention to detail and a systematic approach. By anticipating possible difficulties, you can minimize frustration and ensure a smooth and successful outcome.
Identifying and Addressing Stripped Screws
Stripped screws are a common frustration when disassembling any mechanical device. This occurs when the screw’s threads are damaged, making it difficult or impossible to turn with a screwdriver. Careful inspection of screws before attempting removal is vital. If a screw is already loose or shows signs of damage, consider using a different screwdriver type, like a Phillips or flathead, or a specialized tool designed to grip stripped screws.
In cases where a screw is severely damaged, a drill with a specialized bit or a screw extractor set might be necessary.
Dealing with Damaged Parts
During disassembly, showerhead components can sometimes be damaged. O-rings, seals, or other plastic parts might be brittle or broken. Visual inspection of each part before removal is essential. If a part is cracked or shows signs of weakness, carefully note its condition for the reassembly process. Documenting the state of each component before disassembly will ensure proper selection and placement during reassembly.
Ever wondered how to dismantle that old Moen showerhead? It’s surprisingly straightforward! First, check for any obvious screws or clips. If you’re looking for a new home in a fantastic location, you might consider checking out the selection of homes for sale in Grafton, Ohio. Once you’ve found your dream home, you’ll want to ensure the showerhead is sparkling clean for your new abode! Just remember to carefully follow the manufacturer’s instructions for the best results.
Consider replacing any damaged parts to maintain optimal function and water-tight seal.
Common Disassembly Issues and Solutions
- Rust or Corrosion: Rust on metal components can make screws and fasteners difficult to remove. Apply a penetrating oil or lubricant to the affected area and allow it to soak for a few minutes before attempting removal. In severe cases, a wire brush or a gentle sanding may be necessary. A lubricant like WD-40 can also help loosen stubborn screws.
- Loose or Missing Parts: Loose or missing components during disassembly indicate a possible manufacturing defect or improper handling. Carefully check all parts for missing or misplaced pieces. If necessary, use tweezers or small tools to retrieve the components. Inspect the showerhead assembly to identify the cause of the loose or missing parts, and rectify it for optimal function.
- Bent or Deformed Parts: Avoid applying excessive force when disassembling. If a part is bent or deformed, careful handling and the use of appropriate tools can often help in retrieving the part and prevent further damage. Replacing the deformed part is usually the best solution.
Importance of Careful Handling
The delicate nature of showerhead components requires utmost care throughout the disassembly process. Applying excessive force can easily damage the seals, O-rings, and plastic parts, leading to leaks or malfunctions after reassembly. Use appropriate tools to avoid damaging delicate components. Handle each part individually and store them in a safe place to prevent loss or damage.
Reassembly Procedure and Considerations
Reassembling the showerhead requires the same meticulous attention as disassembly. Refer to the original diagram or instructions for correct placement of parts. Ensure all components are properly aligned and seated to prevent leaks. Tighten screws and fasteners gradually, avoiding over-tightening, which could cause damage. Apply a thin layer of sealant to O-rings and other seals if necessary.
Double-check all connections to ensure proper operation before using the showerhead.
Ever wondered how to dismantle a Moen shower head? It’s surprisingly simple! First, grab some pliers and a flathead screwdriver. To find the right contact information for your insurance needs, you can check out Security National Insurance Company’s phone number in Florida here. Once you’ve got your insurance sorted, you can easily take apart your Moen shower head by following the simple steps online.
Just remember to handle those delicate parts with care!
Reassembly Procedure
Reassembling a showerhead requires meticulous attention to detail and the correct sequence of steps. Incorrect reassembly can lead to leaks, faulty operation, or even damage to the showerhead itself. Careful adherence to the specific instructions detailed below ensures a successful and leak-free installation.Precise reassembly is crucial to guarantee optimal performance and longevity of the showerhead. The correct alignment of parts is vital for preventing leaks and ensuring a smooth, consistent water flow.
This section details the step-by-step process for reassembly, providing a clear guide for a successful restoration.
Detailed Reassembly Steps
The following table Artikels the critical steps in reassembling your showerhead, progressing from the simplest to the most complex. Each step is accompanied by a concise description, enabling a clear understanding of the actions required.
| Step Number | Action | Illustration Description |
|---|---|---|
| 1 | Align the spray face gasket with the showerhead body. Ensure proper seating, but avoid excessive force. | Visualize a circular gasket, positioned precisely on the showerhead body’s interior. A slight pressure is necessary to secure the gasket without deforming it. |
| 2 | Carefully insert the spray face into the showerhead body, aligning it with the gasket. Apply gentle pressure to secure it. | Imagine the spray face as a circular component that fits snugly into the body. The spray face should be aligned perfectly to avoid misalignment. |
| 3 | Screw the showerhead body and the shower arm together, using a suitable wrench or screwdriver. | Visualize a threaded connection between the showerhead body and the shower arm. A suitable tool should be used to prevent stripping or damaging the threads. Use the correct torque to avoid over-tightening. |
| 4 | Tighten the connection securely but avoid over-tightening. | A firm grip is necessary to ensure a secure connection. Over-tightening can damage the threads or components. Use a torque wrench for precise tightening, if available. |
| 5 | Install the showerhead onto the shower arm. Ensure a secure fit and that the showerhead is stable. | The showerhead is positioned onto the shower arm. The connection should be tight and secure to prevent any slippage or movement. |
| 6 | Test the showerhead by turning on the water supply. Check for any leaks around the connections. | After reassembly, activate the water supply to ensure that no leaks exist. Inspect the connections for any dripping or leakage. |
Comparing Reassembly Methods
A crucial aspect of successful reassembly is selecting the optimal approach. While various methods might seem plausible, a methodical and step-by-step approach, as Artikeld in the table, is generally the most effective. This approach emphasizes the importance of sequential steps, ensuring that each component is properly placed and secured before moving to the next.
Addressing Potential Issues During Reassembly
During reassembly, several issues might arise. For instance, if the showerhead gasket is damaged, it may cause leaks. In such cases, a replacement gasket is necessary. Similarly, if the threads are stripped, professional repair or replacement of the showerhead may be required. Thorough inspection of all parts before reassembly and the use of the correct tools can help mitigate such issues.
Maintenance and Troubleshooting
Maintaining your Moen shower head ensures optimal performance and longevity. Proper upkeep minimizes the risk of malfunctions and extends the lifespan of your fixture. Regular cleaning and preventative measures are key to avoiding costly repairs and ensuring a pleasant showering experience.This section details crucial maintenance steps, preventative measures, troubleshooting common issues, and comparative maintenance requirements for various Moen shower head models.
Understanding these aspects allows you to proactively address potential problems and maintain peak performance of your Moen shower head.
Necessary Maintenance Steps
Regular maintenance is vital for maintaining the functionality and aesthetic appeal of your Moen shower head. This involves simple cleaning procedures that prevent mineral buildup and ensure consistent water flow. Cleaning the shower head regularly, especially after hard water exposure, prevents clogs and ensures proper water pressure.
- Regular Cleaning: Disassemble the shower head periodically (following the disassembly procedure) and clean all components with mild dish soap and warm water. Pay special attention to the spray nozzles and any internal components. Avoid using abrasive cleaners or harsh chemicals that could damage the finish or internal mechanisms.
- Scale Removal: If hard water is a concern, consider using a descaling agent (available at hardware stores) to prevent mineral buildup. Follow the manufacturer’s instructions carefully for optimal results.
- Inspecting for Clogs: Regularly check for clogs in the shower head’s spray nozzles. If clogs are observed, use a small, soft brush to dislodge any debris.
Preventing Issues During Disassembly and Reassembly
Careful handling during disassembly and reassembly is critical to avoid damage. Precise procedures and attention to detail help maintain the shower head’s integrity and prevent malfunctions.
- Gentle Handling: Avoid excessive force during disassembly and reassembly. Use a gentle, controlled approach to prevent breakage or damage to the shower head components.
- Correct Orientation: Ensure that each part is reassembled in its correct orientation. Misalignment can lead to improper function or damage.
- Secure Connections: Ensure all connections are properly tightened during reassembly. Loose connections can lead to leaks or malfunctions.
Tips for Maintaining Shower Head Function
Implementing these tips can significantly improve the performance and lifespan of your Moen shower head.
- Avoid Harsh Chemicals: Refrain from using harsh chemicals or abrasive cleaners to clean the shower head. These can damage the finish and internal components.
- Regular Inspection: Visually inspect the shower head for any signs of damage, leaks, or clogs on a regular basis. Addressing these issues promptly will prevent more significant problems.
- Proper Water Pressure: Ensure that the water pressure isn’t excessively high, as this can strain the shower head components and cause premature wear.
Common Issues and Troubleshooting Steps
Addressing potential issues proactively can save time and money. Recognizing the common problems and their solutions helps you maintain the shower head effectively.
- Weak Water Flow: A weak water flow could be due to clogs in the spray nozzles, mineral buildup, or a loose connection. Disassemble, clean, and reassemble as necessary.
- Leaks: Leaks can arise from loose connections during reassembly. Ensure all connections are secure and properly tightened. If the leak persists, consult a plumber.
- Noisy Operation: A noisy shower head may indicate a loose component or a clog. Disassemble, clean, and reassemble to identify the source of the noise.
Maintenance Requirements Comparison
The following table provides a comparison of maintenance requirements for various Moen shower head models. This helps you tailor your maintenance schedule to your specific model.
| Shower Head Model | Frequency of Cleaning | Descaling Needs | Potential Issues |
|---|---|---|---|
| Moen 2000 Series | Monthly | As needed (hard water areas) | Clogs, leaks, weak water flow |
| Moen 3000 Series | Bi-monthly | As needed (hard water areas) | Clogs, leaks, weak water flow, noisy operation |
| Moen 4000 Series | Quarterly | As needed (hard water areas) | Clogs, leaks, weak water flow, noisy operation, potential finish damage |
Final Summary
Successfully disassembling and reassembling your Moen shower head is a rewarding experience, allowing you to maintain and troubleshoot your shower system effectively. This guide has provided a clear, step-by-step approach, enabling you to confidently navigate the process. By understanding the design, utilizing the right tools, and adhering to safety precautions, you can restore your shower head to optimal performance.
Remember, careful attention to detail throughout the process is key to a successful outcome.
FAQ
What are common tools needed to take apart a Moen shower head?
Common tools include a Phillips head screwdriver, adjustable wrench, pliers, and possibly a small flathead screwdriver. Always select tools appropriate for the specific components you’re working with.
What if a screw gets stripped while disassembling?
If a screw gets stripped, try using a different screwdriver bit or a specialized tool designed for stripped screws. If that doesn’t work, consider replacing the damaged screw or component.
How do I know if my shower head model is compatible with the steps in this guide?
Moen offers various shower head models. Always consult the specific model’s manual or Moen’s website for specific instructions tailored to your particular shower head.
What should I do if a part breaks during disassembly?
If a part breaks, carefully examine the damage and try to identify a suitable replacement part from a hardware store or Moen’s website. If the damage is extensive, consider professional assistance.
